First, congratulations on investing in the growth of your ecommerce business! If you are reading this, you have likely either recently purchased HubSpot, are testing HubSpot's free tools while considering purchasing HubSpot or are doing research on how HubSpot can support you Magento 2 hosted online storefront.
You may have also gone a step further and integrated Magento 2 with HubSpot using Unific's extension, or one built by another developer.
We're going to talk about the things you can now do to shorten time to value, and capitalize on the combined value of your shopping cart and marketing automation platforms.
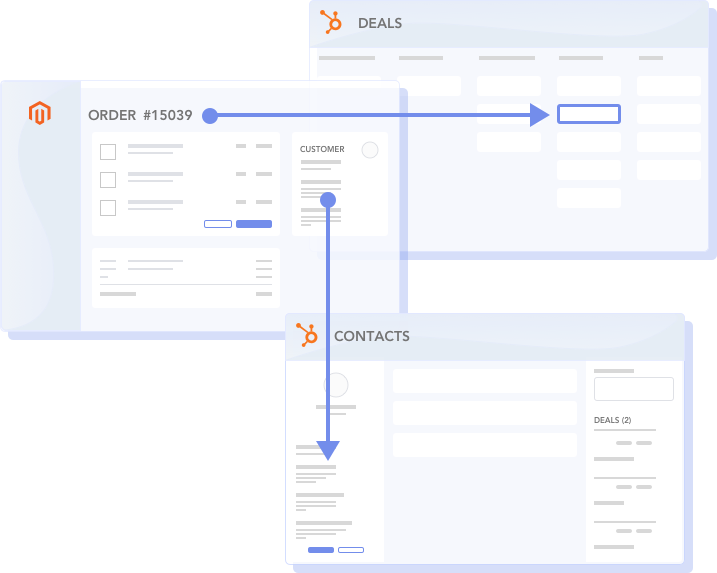
Sync customer and order history from Magento 2 to HubSpot
With your integration syncing new customers and orders to HubSpot, let's focus on pushing the data you've collected in Magento 2 while your store has been operational.
There are some considerations to keep in mind as your import your data:
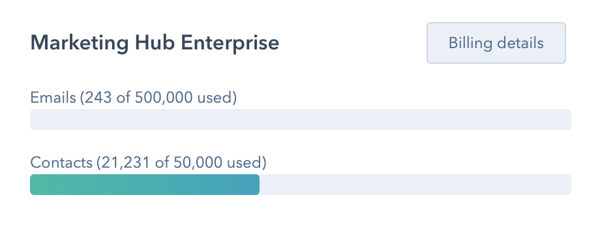
1) Contact volume limits in HubSpot - if you are using the Free Tools & CRM you might have noticed that you can have up to 1 Million contacts in your portal. Awesome, right? What is important to note is pricing for all paid Marketing Hub subscriptions (including the tools needed to run marketing automation for abandoned cart recovery campaigns) include a contact volume-based cost structure.
It's worth being thoughtful about what data you want to move into HubSpot at this point (especially if you have a large volume of contacts that have been collected over many years of operations,) because the more contacts you have, the more a subscription will potentially cost long-term.
If you need or want to suppress contacts from migrating into HubSpot, you might consider limiting to a recent time period of customers who have purchased or perhaps those that have spent the most at your store. If you are migrating from another email marketing tool, perhaps analyze engagement data and weed out those contacts that have not been opening your email.
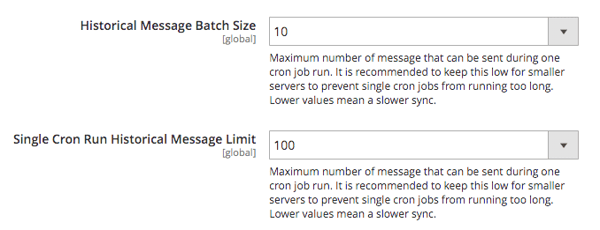
2) Server capacity and data throttling - If you have a significant volume of contacts being synced to HubSpot, you can unknowingly tax your Magento 2 instance's servers and degrade the performance of your store.
Unific's extension provides administrators with the ability to manage this inside Magento and we work with our customers to ensure the sync of your cart data history does not create a disruption. Check with your vendor to ensure you've set the proper limits to manage this appropriately.
3) Make sure to audit for accuracy - this one is more common sense, but before starting a dynamic list building effort or initiating any new workflows make sure to conduct a broad audit of the data after it's been migrated. Spot check records to make sure data is accurately mapped from Magento to the correct fields in HubSpot across your Contacts and Deals.
Create Smart Lists of your key customer lifecycle segments
Now that you have your customer and order data in HubSpot, let's put it to work. When you think about the different milestones a customer reaches during their relationship with your business (aka. customer lifecycle stages) can you pinpoint specific criteria in your data to easily segment them? With HubSpot's list building tools this is made very easy. (And, with Unific, it's even easier because we automatically build a number these list segments for you!)
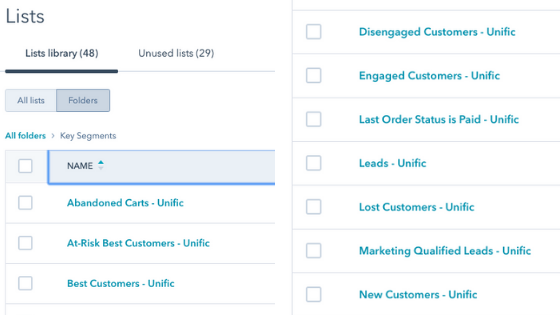
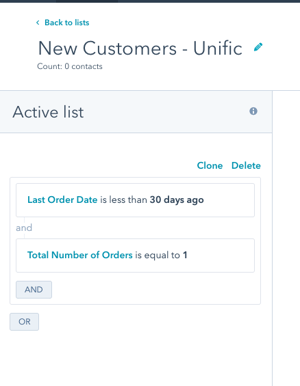
Let's use New Customers as an example. Say you want any customers who have one lifetime purchase, and limit it to the last 30 days. Start by navigating to Contacts > Lists and then hit the "Create list" button in the upper right corner. Select "Contact properties" as your filter type and search for the Last Order Date field, select "is less than" and change to 30 days. Next find Total Number of Orders (or similar named field) and set as equal to 1. Be sure to name your new list, hit save and give yourself a pat on the back... you've just created your first smart list in HubSpot.
You can rinse and repeat this process for all of the different stages you want to create segmented lists (like those in the image above) for your marketing purposes. You can learn more about creating lists here.
Build and publish your first ecommerce workflows
(Note: To create a workflow you must be on HubSpot Marketing Hub Professional or above.)
If you are leveraging a Magento 2 to HubSpot integration that is built on HubSpot's Ecommerce Bridge API (like Unific's) you can navigate to Settings by clicking the gear in the upper right corner, then scrolling the left navigation menu to Integrations > E-commerce. There you'll see a quick and easy guide to build automation for new customer, abandoned cart and re-engagement campaigns.
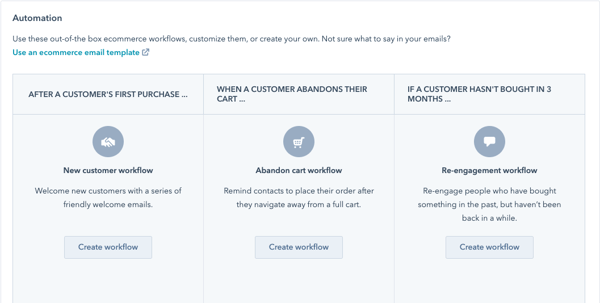
For each of these workflows, the triggering conditions are pre-defined so all you need to focus on is what happens when a contact that meets the criteria enters the workflow. You should build at least one unique email to send with each campaign but can customize the actions as you see fit, including adding delays, sending internal notifications, setting property values and more.
If you would like to create workflows against different criteria, you can navigate to Automation > Workflows and click "Create workflow." From here you can use membership on the lists you built in the previous step as triggers, among other criteria. You can learn more about how to create workflows here.
Other helpful HubSpot tools you may want to get started with
1) Install Live Chat on your store - if you don't already have a chat portal on your site, and you have the internal resources to monitor and respond to inbound inquiries from your site, this is low-hanging fruit for any ecommerce store. Having a person/team that can quickly respond to customer questions or concerns can have a meaningful impact on revenue over time.
You can also build bots to offer discounts or other incentives to shoppers to help increase conversion rates.
To do this, you need to first install the HubSpot tracking script on your website. Then you can follow instructions from HubSpot's Knowledge Base to:
2) Setup Google and Facebook ads campaigns - HubSpot's Ads tool can be a timesaver for ecommerce marketers as a central point of management for your paid search and social media campaigns. Plus, you can use the data you just synced from your store to build lists and look-a-like audiences, as well as set up retargeting campaigns. There are a few steps needed to getting this up and running, and this article covers them in detail.
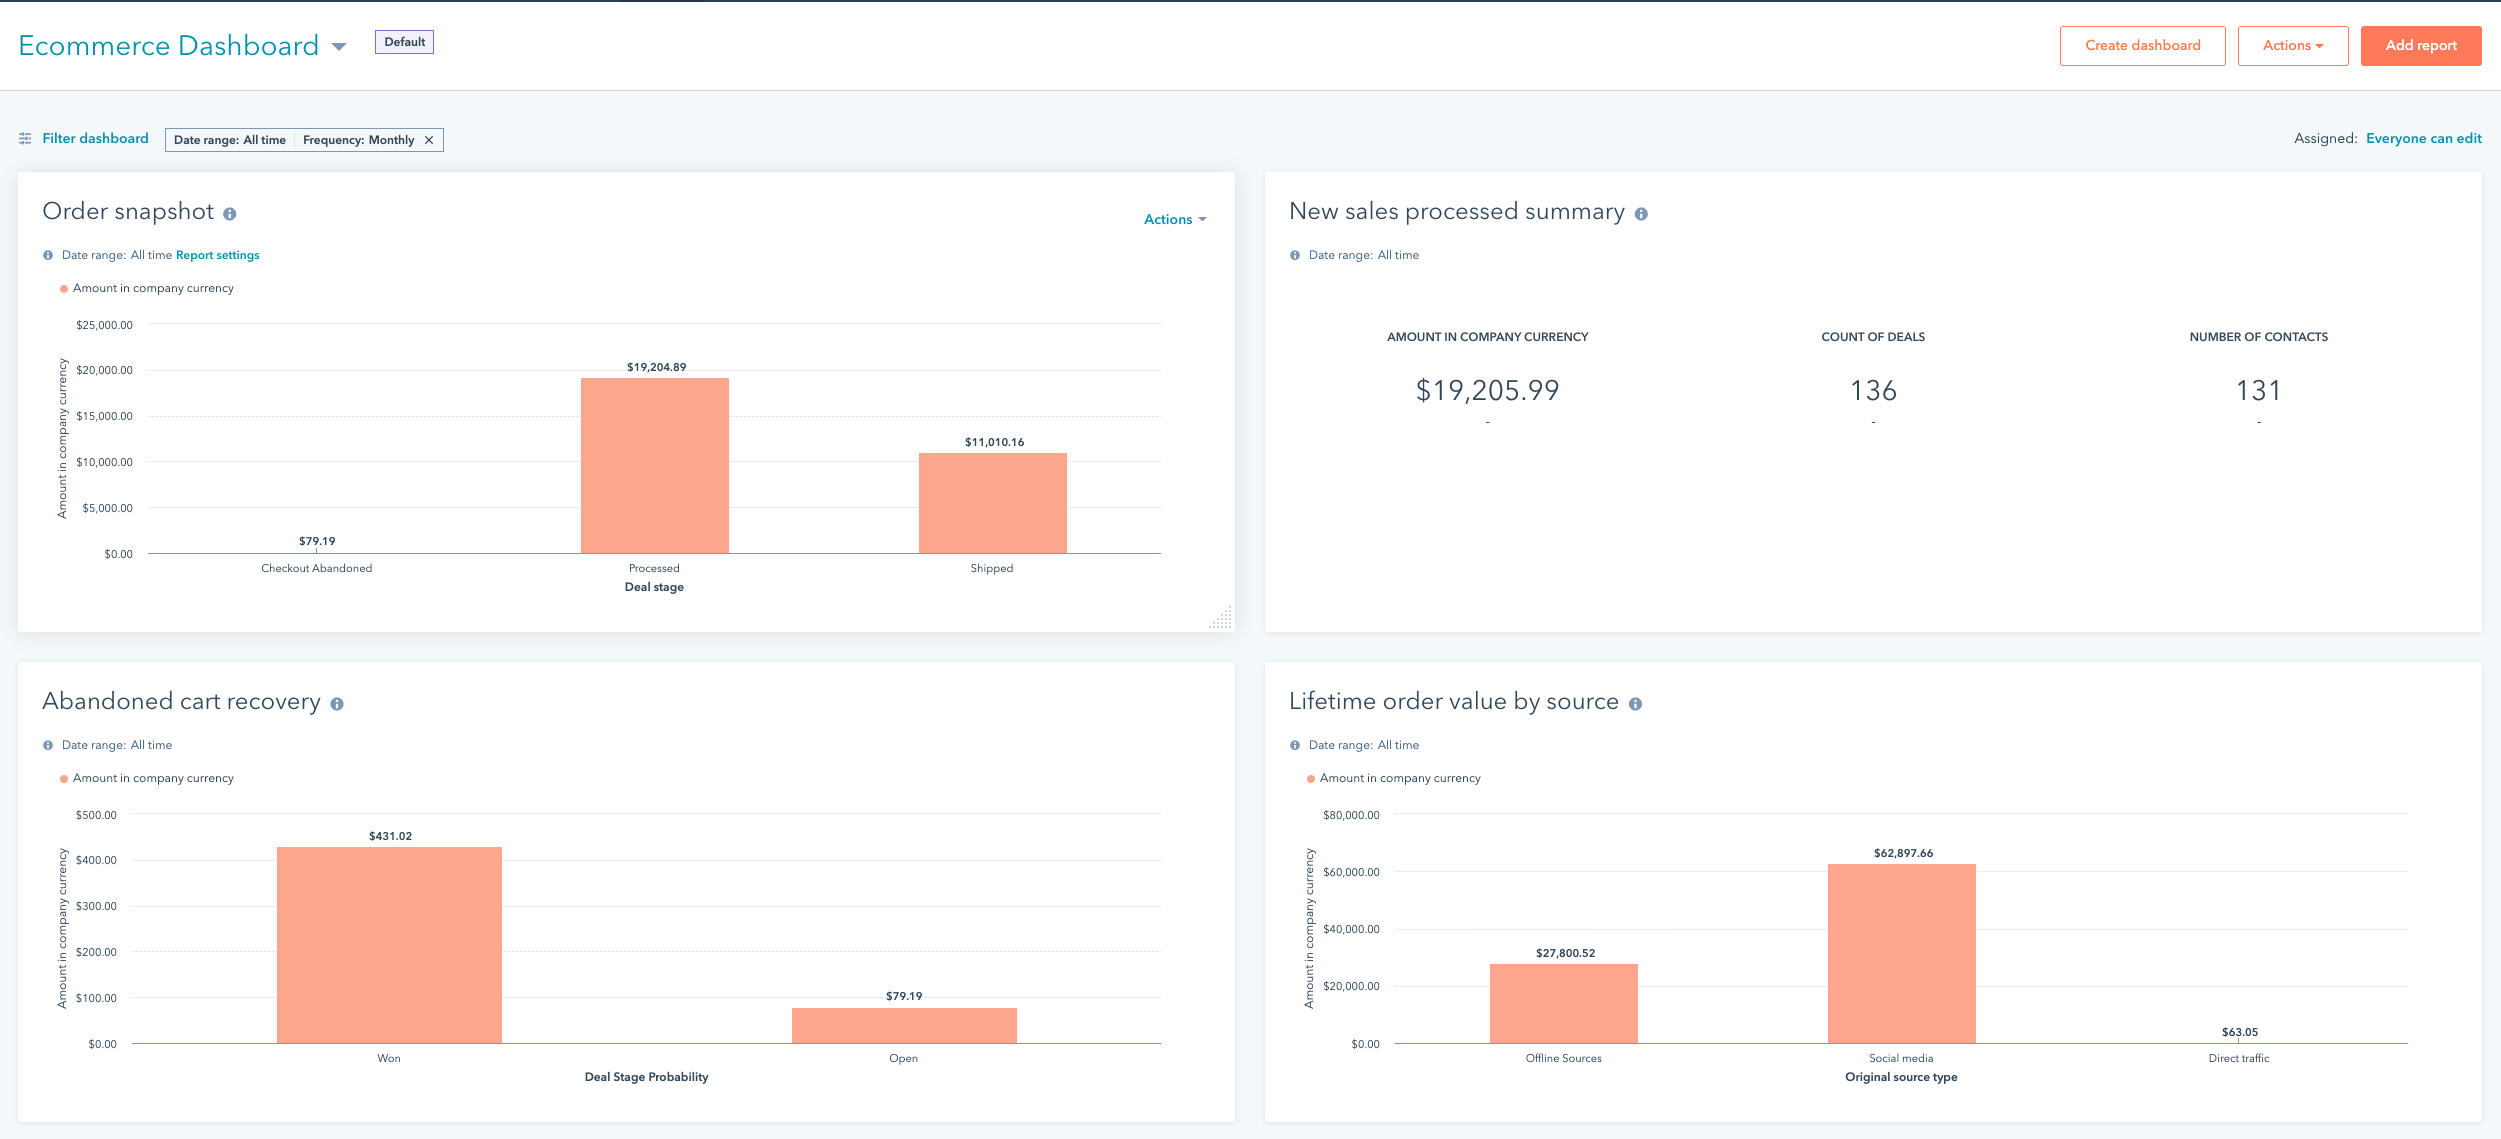
3) Review your ecommerce reports and dashboard - when you sync your Magento 2 store to HubSpot with an integration built with the Ecommerce Bridge API you'll notice that an Ecommerce dashboard is now available to you. To get to it navigate to Reports > Dashboards and select Ecommerce Dashboard. Next, select "Actions" from the upper right corner and hit "Set as default dashboard." Now anytime you go to dashboards you will automatically see your key ecommerce metrics front and center.
You can change the order of the reports by dragging them into place, and you can build and add other reports (depending on your subscription level) to the dashboard as well.
Wrap-up
We hope this article provides some guidance on how you can quickly start to get value from your investment in HubSpot. If you get lost, confused or have questions, please feel free to reach out to us using the chat function on this page.
If you are just researching and would like to learn more about HubSpot plans, how to integrate your Magento 2 store to HubSpot or Unific, you can use the meeting scheduling tool below to set up a time to chat.
Or, if you have a Magento 2 store and a HubSpot account, but still need to integrate them, we invite you to create a free account here to get started.